- NetCOBOL uses a software license management system that needs a special key code to enable its use beyond the initial trial period (usually 5 days). The installation dialogs guide you through the registration process. This guide provides background information and step-by-step guidelines for those that want them.
- If something happens to your machine, or you want to move your NetCOBOL license to another machine, or you want to uninstall the product for a while, there are specific actions you need to take in order to preserve your license. These actions are described in this guide. Remember to come back to this guide before moving NetCOBOL!
For many people there will be too much information and an unnecessary detailing of the installation steps - if you are one of these people go ahead and follow the installation dialogs; come back to this guide if you get stuck or want to understand more about what is going on.
If you are the sort of person that prefers some background information and guidelines before diving into something new, read on, picking out the information you want to know. The guide covers a lot more than just installing your product - just pick out the pieces you need right now.
This chapter gives you a quick overview of the information provided in this manual and points you to the appropriate place to get started.
1. If you have anti-spyware software
We have found that Microsoft's anti-spyware software can prevent NetCOBOL
installing successfully. Although NetCOBOL does not
install any spyware, it appears that the Microsoft
software may be preventing certain registry settings so that some core NetCOBOL software does not execute. (See the description in Chapter 6 for details of the problem). We have not
heard of problems with other anti-spyware products
but it is possible that others may have similar effects. To be sure this
doesn't happen:
- Disable all
anti-spyware software.
- Install Fujitsu
NetCOBOL following the instructions
in this manual.
- Once
installation is complete you can enable your anti-spyware
software.
2. For those who obtain a full license:
If you remove NetCOBOL from a machine, or want to transfer NetCOBOL to another machine, it is important that you follow the instructions in Chapter 5 for preserving or transferring your licenses.
Uninstalling and reinstalling to another folder can also result in the loss of your license.
Failure to preserve your license or transfer your license may result in you having to purchase another license so be careful!
3. Speed Disk defragmentation users
Please see the section "Possible Conflicts with SpeedDisk Defragmentation" in Chapter 6 about an important setting you have to make to ensure that SpeedDisk does not cause the loss of your NetCOBOL license.
NetCOBOL and License Management
NetCOBOL has license controls built into it. The license control is required for anyone using the product beyond the initial trial period of 5 days.
The software installation process includes a step of sending an email note to our license control server. This server checks that you have a license for the product you are installing and returns a site key that fully enables your software. Without the site key, a 5-day trial is installed. You can run the registration program later to upgrade your 5-day trial to a full license.
The license management system used with NetCOBOL is quite straightforward to use. This guide provides all the information you need to know to install and maintain your licenses.
Latest Information
If we find any information that affects your installation or use of the license management system (for example, late-breaking issues in upgrading to the latest release of Windows XP) we will post it on this page:
http://www.netcobol.com/support/licensemanagement.html
If all you want is an easy-to-follow, step-by-step, set of instructions for installing and registering your software you can go straight to “Chapter 4. Installing NetCOBOL – Detailed Steps”.
Explanation of System and Installation Processes
If you feel more comfortable understanding the license management system and want an overview of the installation processes, then you should read Chapters 2 and 3 that give overviews of the system and processes.
Upgrading from Windows 98 or Windows Me
to Windows XP, Windows 2000 or Windows Vista
Because of differences in the systems and folder structures between Windows 98/Me and the Windows XP/2000/Vista operating systems, you need to kill your NetCOBOL license and uninstall NetCOBOL before upgrading between these operating systems. The section "Preserving a License over Significant Machine Changes, or Upgrading from Windows 98/Me to Windows XP/2000/Vista" in Chapter 5 describes the steps you need to take.
Other Situations
The rest of the guide covers other situations that you may encounter, such as coping with situations such as transferring licenses or dealing with losing licenses through machine corruption, and trouble shooting installation problems.
The appendices provide answers to frequently asked questions and information on contacting Fujitsu Computer Systems on license-related matters.
This chapter gives an overview of the license management system so you can understand the various steps you need to take.
It also provides a glossary of license management terms.
The License Management System
It may help you understand the various actions you have to take in certain circumstances by understanding how our license management system works.
There are essentially two parts to the License Management System – a license-managing server on the Internet, and license-managing software on the machine that has NetCOBOL installed.
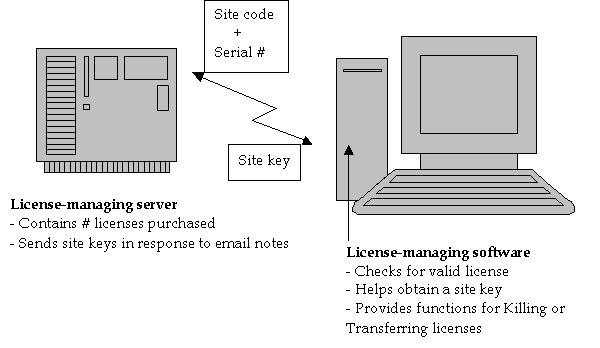
Figure 1. License Management System
When you purchase one or more copies of NetCOBOL the number of licenses is entered on the license-managing server.
When you install NetCOBOL on your computer you have 5 days in which to obtain a site key from the license-managing server. This is done by sending an email note to the server. The email note contains an encrypted message that combines your site code (which is unique to your computer) and your serial number (sent to you with the software). The encrypted message is generated for you by the license management software and, if your email software supports the appropriate interface, can be written and sent for you automatically. If your email software does not support the automatic generation and transmission of the email note, you simply create an email note under the instruction of a wizard, pasting all the relevant information from the system clipboard.
The site key is used to generate a license on your machine that is checked by the NetCOBOL software at startup. It matches the site code and serial number so can only be used on the one machine.
Each time you obtain a site key, the license managing server decrements the number of licenses you have available. Once you have obtained site keys for all the copies of the software that you have purchased, the server will not issue any more site keys. If you attempt to obtain another site key, it will send you an email note telling you that all your licenses have been used.
Obviously different circumstances can occur that require an extra site key to be generated. These circumstances should be covered by one of the following items in Chapter 5 “Managing Your Licenses”:
· You want to move the NetCOBOL software to another machine – to do this you need to Transfer the license. See “Transferring a License to Another Machine”.
· You are upgrading your machine, or upgrading or reinstalling your operating system, involving operations that you fear may cause your license to be removed. See “Preserving a License over Significant Machine Changes, or Upgrading from Windows 98/Me to Windows XP/2000/Vista”.
· Something happens to your machine, like your hard disk going bad, which means you are no longer able to execute the license management software. See “Handling Machine Failures that Cause License to be Lost”.
· You want to use the software on multiple machines for reasons such as home-use, or use when traveling. See “Using NetCOBOL on Multiple Machines”.
If you think you have a situation that is not explained by any of the above-mentioned sections then open an incident using our web support tool http://www.netcobol.com/support/index.htm. See “Handling Machine Failures that Cause License to be Lost” section.
Glossary of License Management Terms/Functions
The following is a list of the terms and functions used in the license management system.
Check: A function on the first Fujitsu NetCOBOL Registration dialog displayed by the license management software. It checks what license is installed on the machine and displays that information in a message box.
Confirmation Code: A code returned by the Kill function when a license is removed from the machine. For full licenses it is important to save this code and send it to Fujitsu Computer Systems so that your license count can be incremented by one on the License-Managing Server.
Get Site Key: A function on the second Fujitsu NetCOBOL Registration dialog, displayed by clicking the Register button on the first Fujitsu NetCOBOL Registration dialog. This function either automatically sends an email note to the License-Managing Server or invokes a Wizard that helps you create the email message manually. The email note contains encrypted versions of the Site Code and Serial Number and triggers a response which provides you with a matching Site Key.
Kill: Word used to describe the process of removing a license from a machine. The Kill function returns a Confirmation Code which must be sent to Fujitsu Computer Systems so that your license count can be updated on the License-Managing Server.
License-Managing Server: A server on the Internet that keeps track of the number of licenses issued to each customer. It waits for emails generated by the Get Site Key function and responds to them with license-enabling Site Keys or messages indicating if there are problems issuing the Site Key.
License-Managing Software: Software installed with NetCOBOL that: helps with registering the software, checks that a valid license is installed, and provides license maintenance functions such as transferring and killing licenses.
Register: Term for either invoking the main license controlling dialog, or for writing registration information to a floppy disk, or other read/write device that can be addressed by a drive letter (e.g. a USB drive or network drive), as the first step in the license transfer handshake between two machines.
Serial Number: A number assigned to each customer or product purchase, which is required for product installation and registration. It identifies you to the License-Managing Server, enabling it to establish the number of licenses you have available. This number is generally printed on a label on your CD sleeve. After your first installation it is stored and offered to you as the default serial number for subsequent installations on the same machine (so if you have to uninstall and reinstall your Serial Number is remembered).
Site Code: A code generated that is unique to your machine. It is sent to the License-Managing Server along with your Serial Number in an email note generated by the Get Site Key function.
Site Key: A code that is returned to you by the License-Managing Server, in response to the email note sent by the Get Site Key function. The Site Key will only work with the correct pair of Site Code and Serial Number. When you receive your Site Key, you use the Validate function to check the Site Key and register your license on your machine.
Transfer In: Function for receiving a license transferred from another machine. A read/write device that can be addressed by a drive letter (e.g. floppy disk, USB drive, network drive) is used to perform the transfer. The process starts on the Transfer In machine, which writes machine-specific information to the drive. The device is either moved to the Transfer Out machine or addressed from that machine, where it receives the license – encoded using the machine-specific information. The process is concluded by using the Transfer In function again to copy the license from the device to the Transfer In machine.
Transfer Out: Function for moving a license off a machine to another machine. A read/write device that can be addressed by a drive letter (e.g. floppy disk, USB drive, network drive) is used to perform the transfer. The Transfer Out function takes machine-specific information written to the device by the Transfer In function on another machine. It uses this information to create a license for the target machine and writes that to the device. It then removes the license from the current machine.
Validate: Function used to validate a Site Key and establish a license on the machine.
This chapter provides summaries of each of the different installation scenarios you are likely to encounter. For those who prefer to follow the on-screen instructions by themselves, the summaries provide sufficient context for you to dive in and get going.
The installation scenarios covered are:
· Installing NetCOBOL V9 as your first installation of NetCOBOL
· Upgrading to NetCOBOL V9 from an earlier release
· Upgrading a Trial License to a Full License
Installing NetCOBOL V9 as your first Installation of NetCOBOL
The steps for installing NetCOBOL V9 from scratch are:
1. Insert the CD containing NetCOBOL V9 or, if you downloaded the product, unzip the zip file and invoke autorun.exe from the folder into which you unzipped the files.
2. Select “NetCOBOL Suite” from the “NetCOBOL Master Setup” window.
3. Enter your serial number (supplied on the sleeve of the CD, or emailed to you).
4. Follow the InstallShield dialogs to install the software.
5. When the software is installed the installer displays the NetCOBOL Registration dialogs. These enable you to register your product and obtain your full license – if you don’t obtain the full license the product is only enabled for 5 days.
6. On the first dialog you click on “Register” and the second dialog you click on “Get Site Key”.
7. What happens next depends on whether your
email program supports the automatic generation of email notes or not.
- If it does, an email note is created for you, and you just have to ensure
that the note is sent and wait for a reply with your Site Key.
- If it doesn’t, a wizard is invoked that guides you
through the steps of creating an email note – it puts the appropriate text on
the clipboard, which you then paste into your email note. (Note there is an
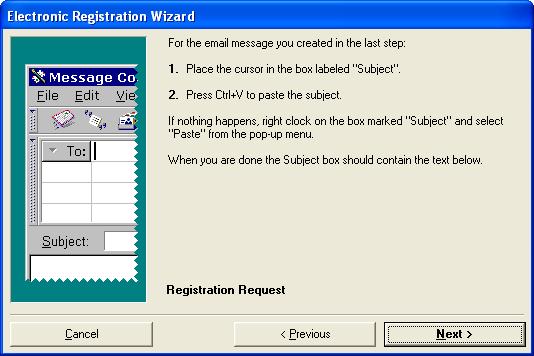
error in the first dialog – it says “When you are done the Subject box should
contain the text below”, it should say the To box not
the Subject box.)
- If your machine does not handle email then you
should go to the detailed instructions for a description of your options.
8. When you receive your Site Key, copy and paste it into the Site Key field and press the Validate button.
9. You then exit out of the dialogs and you are done.
10. You will find Fujitsu NetCOBOL on your Start > All Programs menu.
Upgrading to NetCOBOL V9 from an Earlier Release
The process for upgrading to NetCOBOL V9 is almost identical to the process of installing NetCOBOL from scratch. The only points of difference are:
· Make sure you use your V9 serial number, as this is the number recorded on the License Management Server.
· If a previous version of NetCOBOL is detected it will be uninstalled. To be safe you should ensure that you do not have any of your own files within the \Program Files\Fujitsu NetCOBOL for Windows folder structure.
If you first obtained NetCOBOL as a trial product and then decided to purchase it, or if you decided not to register the product when you first installed, you will need to upgrade your trial license to a full license.
If you have not yet purchased a full license from Fujitsu Computer Systems then you need to call Fujitsu Computer Systems or your Sales Representative to purchase your license.
When you have purchased a new license you invoke the NetCOBOL Registration software from the NetCOBOL menu (Start>All Programs>Fujitsu NetCOBOL V9.0>Registration).
You then pick up on the “Installing NetCOBOL V9 as your first installation of NetCOBOL” instructions above at step 6.
Extending your trial period is very similar to upgrading from a trial license. You first need to call Fujitsu Computer Systems or your sales representative to arrange the trial extension. Once this has been approved, we will enter the agreed extension period on the License Management Server.
You then invoke the NetCOBOL Registration software from the NetCOBOL menu (Start>All Programs>Fujitsu NetCOBOL V9.0>Registration) and pick up on the “Installing NetCOBOL V9 as your first installation of NetCOBOL” instructions at step 6.
Instead of receiving a full license, you will receive a license that extends your use of the product by the agreed number of days.
This chapter provides a detailed description of every step (click, or action) that you take when installing NetCOBOL. Snapshots of every dialog box accompany the steps.
The detailed steps cover the following installation scenarios:
· Installing NetCOBOL V9 as your first installation of NetCOBOL
· Upgrading to NetCOBOL V9 from an earlier release
· Upgrading a Trial License to a Full License
These scenarios are all covered in the same set of instructions, as the majority of the steps are the same. Where the different scenarios require different actions, or may result in different dialogs, these are explained within the steps.
Installation Steps
When installing, remember to allow a few minutes for an email note to be sent and a reply sent back to you with the site key. If your machine is not capable of sending and receiving email, you can follow the steps described in the instructions to transfer the email note information to another machine that can send and receive email, or you can open a support incident with Fujitsu Computer Systems when you get to the point of needing a site key.
NOTE: Please take seriously the request of the installer to exit all applications – including resident virus-checking software. These applications may have some MFC (Microsoft Foundation Class) files locked that need to be updated during the installation. A successful installation relies on being able to install the latest versions of these files.
NOTE: For any kind of support, including registration issues, please open an incident using our web support tool http://www.netcobol.com/support/index.htm (complete directions and user guide are provided). The first time you log in, use your e-mail address and a blank password. For security purposes, please change your password after you are logged in.
Upgrading or Extending a Trial License
To upgrade a trial license to a full license, or extend the period of a trial license, you first need to contact Fujitsu Computer Systems to either purchase your full license or find out if you can extend your trial license.
When you have
done this, you invoke the registration software by selecting:
Start > All Programs > Fujitsu NetCOBOL
V9.0 > Registration
from the Windows task bar.
This brings up the first Fujitsu NetCOBOL Registration dialog shown in Step 7 below. You then follow the instructions from Step 8.
Installing
for the First Time
or Upgrading from a Previous Release
To install NetCOBOL for the first time, or upgrade to NetCOBOL V9 follow these steps:
1. Insert the NetCOBOL
CD in your CD drive.
”NetCOBOL Master Setup” should start automatically.
If it does not start automatically, or if you downloaded the product, start the
program “Autorun.exe” in the root folder of the CD or the folder to which you
unzipped the downloaded zip file.
2. In the “NetCOBOL
Master Setup” window click on “NetCOBOL Suite”. This
starts the NetCOBOL installation, which displays the
Authentication dialog:
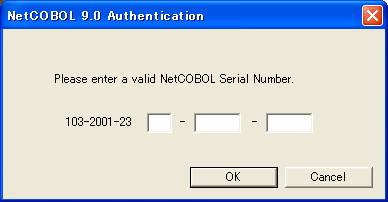
3.
Enter your serial number.
This is provided on the CD sleeve or was emailed to you.
If you are upgrading, make sure that you use your V9 serial number, as this is
the serial number entered in our license control server.
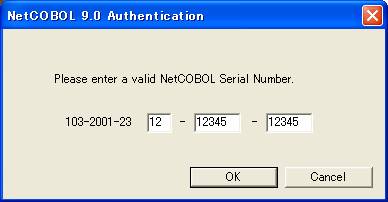
(Picture shows an invalid serial number.)
4.
Click “OK”. You will receive
a message indicating the edition of the product for which you are authorized.
(For example, Standard, Professional or Enterprise Edition.)
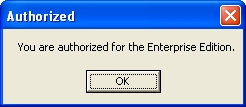
5. Click “OK”.
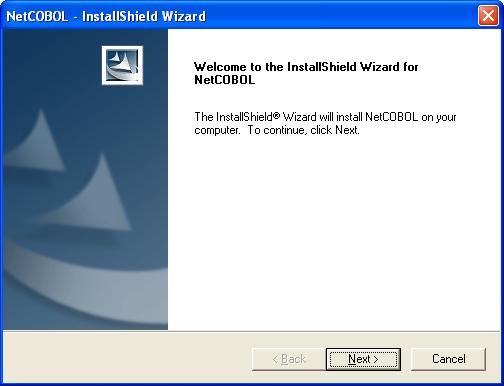
This brings you to the main InstallShield dialogs,
after displaying some "Preparing to Install" messages.
or, if you are upgrading and have not already
uninstalled your previous version of NetCOBOL, you
will see this message:
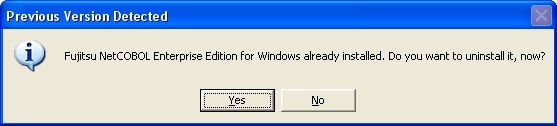
Click “Yes”
if/when you are ready to uninstall your earlier version, and respond “Yes” to
the message asking if you are sure you want to uninstall this product.
You will then see a number of dialogs that say things like “Preparing to
install” and “Please wait while Windows configures NetCOBOL”.
The installer is actually uninstalling your previous version while these
messages are being displayed. At the end of these messages you will come to the
main InstallShield dialog pictured above.
Continue with the instructions below.
6. Follow the instructions to install the software. This will take you through several dialogs including accepting the End User License Agreement (EULA) and selecting which parts of the product you wish to install.
7. After the software has been installed,
the Fujitsu NetCOBOL Registration dialog is
displayed:
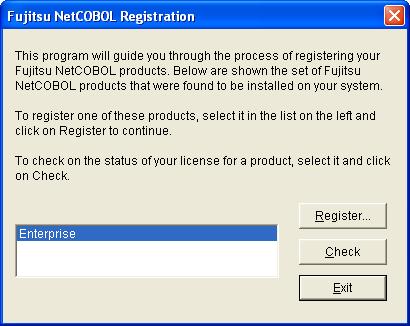
8.
Click “Check” to confirm
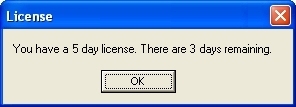
that you have a trial license (a first install always installs a trial
license). You should see the following window:

or, if you are upgrading or extending a trial license, the window will indicate
fewer days remaining:
If you are installing a trial product you can stop here:
Click “OK” in the License window, and click “Exit” from the NetCOBOL Registration window.
If you are installing a fully licensed product continue with these steps:
9. Click “OK” to close the License window.
10. Click “Register” in the Fujitsu NetCOBOL Registration window.
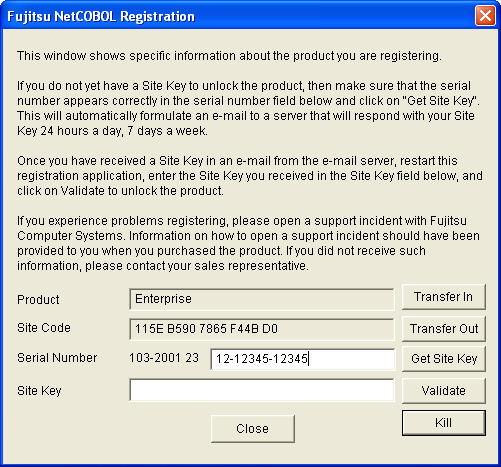
This opens a second Fujitsu NetCOBOL Registration
dialog that displays your product type, your site code that will be sent to our
registration server, your serial number, and instructions on how to proceed:

If you do not have any access to e-mail go to the section “Obtaining a Site Key when you do
not have E-mail on the Target Machine”.
If you are going to send an e-mail note from this or another machine, continue
with steps 11 to 13.
11.
Click “Get Site Key”.
This opens a dialog that asks you to enter your email address:
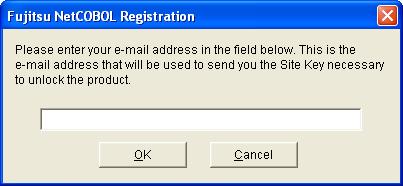
12.
Enter the e-mail address to
which you would like your site key sent. This does not have to be the e-mail
account from which you send the site key request.
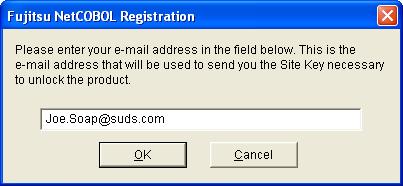
13. Click “OK”.
A window is displayed asking you to confirm your email address:

At this point a number of different things may
happen when you click “OK” in the License dialog:
a) You have an e-mail program, like Microsoft Outlook, that can be invoked
automatically by the registration software. In this case you will see the
message below.

or you may receive warning messages that you need to approve before the above
dialog is displayed (for example allow access for 1 minute) and say Yes to
sending email:


Go to the section “Obtaining a Site Key when an E-mail Note is Sent
Automatically”.
b) You have an e-mail program, like Microsoft Outlook, that can be invoked
automatically by the registration software BUT it is not configured as your
default mail client. You may see a message like this:

When you click “OK” the registration will continue in the sequence described in “Obtaining a Site Key when Your E-mail Software Cannot be Invoked Automatically”. We recommend that you do not adjust your default mail client and continue with the instructions in the section “Obtaining a Site Key when Your E-mail Software Cannot be Invoked Automatically”.
c) You have an e-mail program, like Microsoft’s Outlook Express, that cannot be invoked automatically. You will see this message:
Respond “OK” to this message.
The registration software will start a registration “wizard” that will guide
you through the steps of using your e-mail software manually. Note that it may
take a few moments for the “wizard” dialog to appear. Go to the section “Obtaining a Site Key when Your E-mail Software Cannot be Invoked Automatically”.
d) You do not have an e-mail program on the target machine. As with c) you will see the message:
Respond “OK” to this message.
The registration software will start a registration “wizard” intended to guide
you through the steps of using your e-mail software manually. You can use this
wizard to give you the information to send an e-mail note from another machine.
Go to the section “Obtaining
a Site Key when you do not have E-mail on the Target Machine”.
Obtaining
a Site Key when:
an E-mail Note is Sent Automatically
When the registration software has been able to generate and send a note automatically, it will have told your e-mail program to send the note. However, you may have your e-mail program configured to hold messages in an outbox until you tell it to send the messages, or until the e-mail program hits a preset time for sending and receiving messages.
You may want to check that your e-mail program has sent the message to our registration server.
Having done that, you can continue with the instructions under the heading “Receiving and Validating Your Site Key”.
Obtaining
a Site Key when:
E-mail Software Cannot be Invoked Automatically
When the registration software finds that there is no e-mail software it can invoke automatically, it starts a “wizard” that will walk you through the process of creating an e-mail note to send to our registration server. In this process you will start your e-mail program yourself, create a new note, then paste in text provided by the wizard. You switch between the wizard and your e-mail program two or three times to create the note.
1. The first dialog displayed by the wizard is shown below:

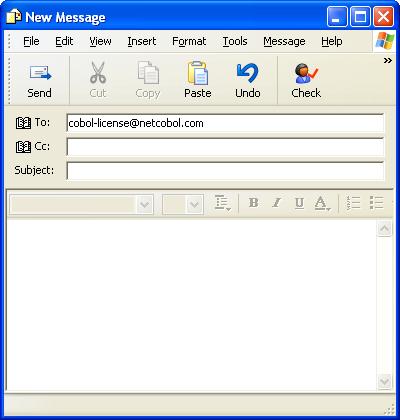
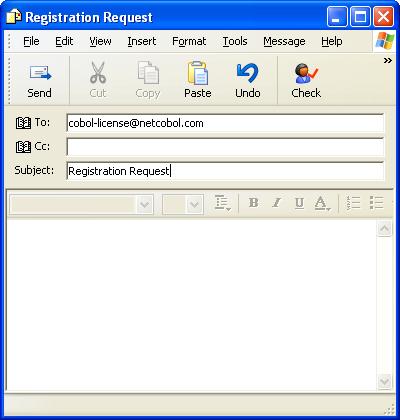
2. Follow the instructions in this window. i.e.:
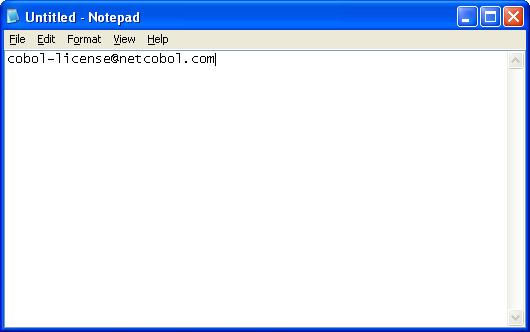
Start your e-mail program (e.g. Outlook Express)
Create a new message
Place your cursor in the box labeled “TO” and press Ctrl + V to paste the
address of our mail server into the box (the wizard has already placed this
text on the system clipboard).
(Note that the text in the Wizard dialog has an error, as indicated in the
picture above, that was not spotted before we went
into production.)
Your e-mail message should look something like this:
3. Switch back to the “wizard” dialog – it is described on the task bar as “Fujitsu NetCOBOL Registration”. (There may be two buttons on the task bar with this title – they will both take you to the same window.)
4. Click “Next”.
This takes you to the second “wizard” dialog.
5. Again follow the instructions in this
window. I.e.:
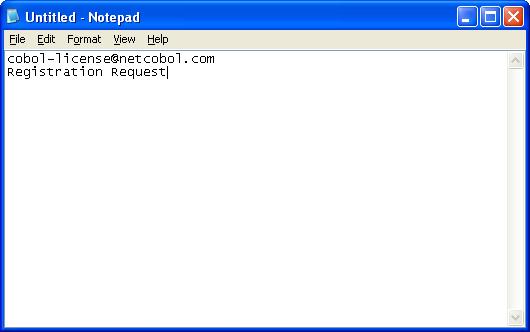
Switch to your e-mail message.
Place the cursor in the box labeled “Subject”.
Press Ctrl + V to paste the subject in this box (the wizard has already placed
this text in the system clipboard).
Your e-mail message should now look something like this:
6. Switch back to the “wizard” dialog.
7. Click “Next” to take you to the third “wizard” dialog:
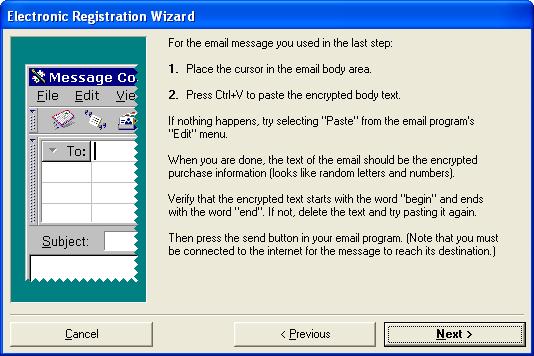
8. Follow the instructions in this window.
I.e.:
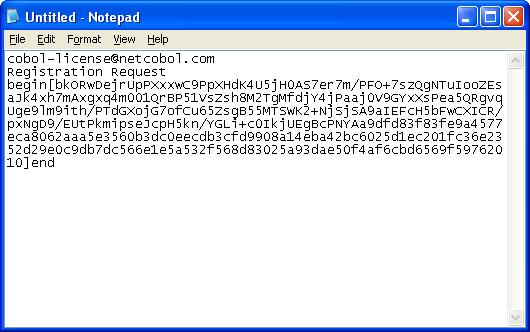
Switch back to your e-mail message.
Place the cursor in the e-mail body area.
Press Ctrl + V to paste the encrypted text into the body area (the wizard has already
placed this text in the system clipboard).
Your email note should now look something like this:
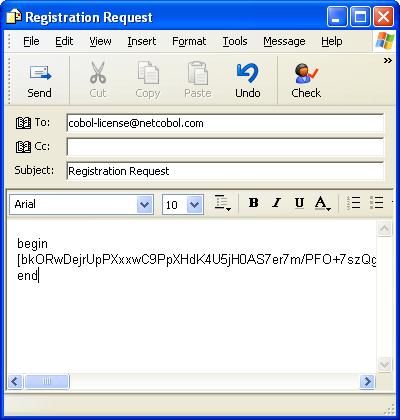
Note that the text in the body should start with the word “begin”, contain a
lot of arbitrary characters between square brackets […], and end with the word
“end”.
9. Send the email message.
Make sure that the message is transmitted and is not just placed in an outbox
folder to be sent later.
10.
Switch back to the “wizard”
dialog and click on “Next”.
This concludes the “wizard” session. The registration software assumes
everything has gone well, displaying the message:
11. Click “OK”.
This returns you to the NetCOBOL Registration dialog:
12. Go to the final instructions “Receiving and Validating Your Site Key”.
Obtaining
a Site Key when:
You do not have E-mail on the Target Machine
If you do not have e-mail on the target machine, you can either you can either:
1) Use the “wizard” to generate the information to be sent and send the information by email from another machine.
-or-
2) Open an incident using our web support tool http://www.netcobol.com/support/index.htm (complete directions and user guide are provided). The first time you log in, use your e-mail address and a blank password. For security purposes, please change your password after you are logged in.
Sending Wizard-Generated Information from Another Machine
You can capture the information output by the Wizard in a text file created with the Notepad editor, copy the file to the machine that does have e-mail, then copy and paste the text into the appropriate places. The steps to perform this are given below.
1. You start with the first “wizard” window displayed:
2. Start the Notepad program. This is found on the Start, All Programs, Accessories menu.
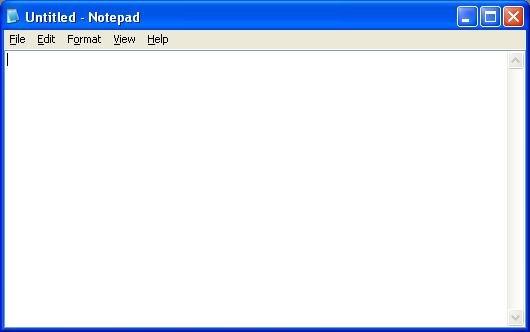
3. Press Ctrl + V to paste in the text placed on the system clipboard by the “wizard”.
4. Return to the “wizard” dialog – it is described on the task bar as “NetCOBOL Registration”. (There may be two buttons on the task bar with this title – they will both take you to the same window.)
5. Press “Next”.
The second “wizard” dialog is displayed:
6. Return to Notepad, and hit “Enter” two times to move down two lines.
7. Press “Ctrl + V” to insert the subject into Notepad.
8. Again return to the “wizard” dialog and
click on “Next”.
This brings up the third “wizard” dialog:
9. Switch to Notepad and hit “Enter” two times to move down another two lines.
10. Press Ctrl + V to insert the encrypted message text:
11. Save this file using the function “Save As” on the File menu. Give the file a name like “Registration details”. Take note of the folder in which the file is saved.
12. Copy the file to your machine that has e-mail. (You may need to use a floppy disk, a network, or other means of transferring files from one machine to another.)
13. On the machine with e-mail, open the file in Notepad.
14. Open your e-mail program.
15. Create a new message.
16. Then copy each string of text from Notepad to the appropriate fields in your e-mail message, giving an e-mail message that looks something like this:
17. Send this email message.
18. When you receive the response you can follow the
instructions under “Receiving and Validating Your Site
Key”, only you will need to reverse the above process by copying the site
key to a file that you then copy to your target machine, and then copy and
paste into the Site Key field.
You can, of course, copy the Site Key manually by writing it down and entering it
into the Site Key field – just be careful that you get
it right!
Obtaining a Site Key after Installing the 5-Day Trial
Once you reach the NetCOBOL
Registration part of the installation process - all the dialogs following this
dialog:
- you can exit from the registration process at any time and return to it
later.
For example, you can send in your email registration request, then exit from the registration process, planning to return to the process when you receive the email response containing your site key.
The installation process installs a 5-day trial version before the registration process begins. Therefore, when you exit from the registration process, you have a usable version of NetCOBOL – at least for 5 days.
To restart the registration process:
1. Go to the Start > All Programs menu and select “Fujitsu NetCOBOL for Windows V9.0”.
2. From this menu select “Registration”. This displays the “Fujitsu NetCOBOL Registration” dialog shown above.
3. You can then click on “Register” and pick up on the registration process where you left off.
Warning: Do not submit more than one request for a site key from the same machine. If your company has purchased several licenses each registration request will use up one of your licenses – even if the requests come from the same machine. If you are not sure if you have submitted a request, or if you think you submitted a registration request but did not receive a response, it is best to open an incident using our web support tool http://www.netcobol.com/support/index.htm and ask us to confirm what is happening. Better to ask us first, before you inadvertently use up all your licenses! If you only have a single license, then the registration server will let you know if you attempt more than one license request.
Receiving and Validating Your Site Key
The following instructions guide you through the process of receiving and validating your site key.
1. Go to your e-mail program and check to see if a
reply has come from the registration server.
(If you know that it takes a long time for your Internet Service Provider to
process mail or if, for some other reason, you do not receive a reply within a few
minutes, you can close the NetCOBOL Registration
dialog and come back to the registration process later. The process is
described in “Obtaining a
Site Key after Installing the 5-Day Trial”.)
A reply will look something like this:

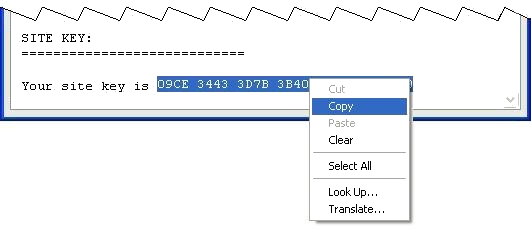
Note that the site key is at the bottom of the note, after some instructions on how to use it.
2. Select the site key by double clicking on the key, or dragging the mouse pointer over it, and copy it to the clipboard by right clicking on the selected text and selecting “Copy” from the pop-up menu.
3.
Switch to the NetCOBOL Registration dialog and paste the site key into the
Site Key box (place the cursor in the box and press Ctrl + V).
The dialog should now look like this:
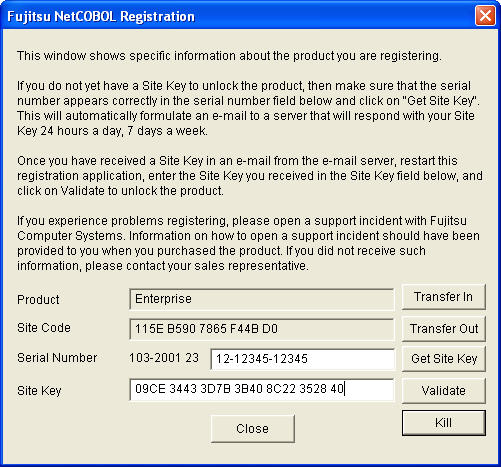
4. Click on “Validate” to complete the registration
process.
A warning message will be displayed saying that the trial license will be
overwritten.

Attention: If you get a message telling you that you already have an unlimited license, do NOT overwrite it unless instructed to do so by a Fujitsu Computer Systems support representative. Overwriting an existing, unlimited license means that you are using up two licenses for a single copy of the product.
5.
Click “OK”.
The system will respond with the message:
6. Click “OK”.
You will return to the Fujitsu NetCOBOL Registration
dialog.
7.
Click “Close”.
This returns you to the first Fujitsu NetCOBOL
Registration dialog.
8.
Click “Check” to confirm
that you now have a full license. You should see this message:
Or, if you are extending a trial license, the message will report the number of
days you now have for your trial:
9. Click “OK” followed by “Exit”.
You are now ready to start, or continue, using the product.
10.
From the Start > All Programs
menu, select “Fujitsu NetCOBOL V9.0”, and
select the NetCOBOL component you wish to start (e.g.
COBOL Project Manager for COBOL program development).
This chapter covers the different situations that may arise during the life of your NetCOBOL license. The situations described, with detailed instructions, are:
· Transferring a License to Another Machine
· Preserving a License over Significant Machine Changes
· Preserving a License when upgrading from Windows 98/Me to Windows XP/2000/Vista
· Handling Machine Failures that Cause Your License to be Lost
· Using NetCOBOL on Multiple Machines
Transferring a License to Another Machine
If you have
installed NetCOBOL on a machine, and obtained and
validated a Site Key, then later decide to move the product to another machine,
there is a process you need to follow to transfer your license. It requires
that both machines can read and write to one of the following:
- A floppy disk
- A USB drive
- A network drive
- basically any read/write device that can be addressed using a drive letter like "X:".
NOTE: The interface indicates that the drive letter should be for a floppy drive. However, you can point to any read/write device that can be addressed by a drive letter.
If either machine does not have access to such a device, then you need to Kill your license on the original machine, and reinstall the product on the new machine. See “Preserving a License over Significant Machine Changes” for details of the Kill and reinstall process.
The overall process for transferring your license is:
·
Install NetCOBOL
on the new machine and, for new installations, remove (or Kill) the temporary
license.
·
On the new machine use the “Transfer In”
function to first register some information on the drive you specify
with a drive letter.
·
On the original machine use the “Transfer
Out” function to transfer the license to the same device – if you
are using a floppy disk or USB drive you insert those in the original machine
and specify the appropriate drive letter; if you are using a network drive you
specify the appropriate drive letter to point to that drive.
·
Return to the new machine
and use the “Transfer In” function to transfer the license to the
new machine.
·
Uninstall NetCOBOL from the old machine.
These steps
are explained in detail below.
We will describe
the target machine as the “new machine” and the machine from which we are
taking the NetCOBOL license as the “old machine”.
Detailed
Instructions
1.
Install NetCOBOL
on the new machine. Proceed with the installation until you get to the first NetCOBOL Registration dialog:
2. Click the Check button.
If this is the first installation of NetCOBOL V9 on
this machine you will be told that you have a 5-day temporary license. Close
the message box and continue with step 3.
If you have previously installed NetCOBOL V9 on the
machine but have killed the license, then you will be told that the product is
not authorized. You therefore do not have a license that needs to be killed so
Close the message box and continue with step 9.
If you get a message saying that you have an unlimited license, STOP! You already
have a valid license on this machine and do not need to transfer a license from
another machine. If you are taking the old machine out of service, you should Kill the license on the old machine, and send the Kill
confirmation code to Fujitsu Computer Systems so that you can be credited with that
license for later use. Steps 1 to 24 of “Preserving a License over Significant Machine Changes”
describe the process of killing a license in detail.
3. Click the Register button to display the
second NetCOBOL Registration dialog:
If the “Transfer In” button is enabled (it shouldn’t
be if you followed the instructions in Step 2) you should go to step 9.
The “Transfer In” button should be disabled because this function will never
overwrite an existing license. The 5-day temporary license counts as an
existing license. Before you can transfer in a full license, you first need to
remove the 5-day temporary license. This is done by using the Kill function.
4. Click on the Kill button.
This brings up the “Fujitsu NetCOBOL Registration
(License Removal)” dialog:
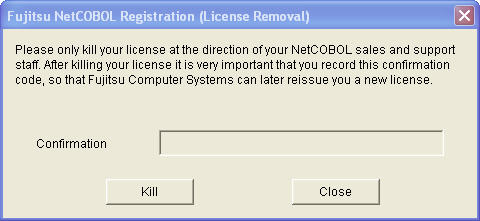
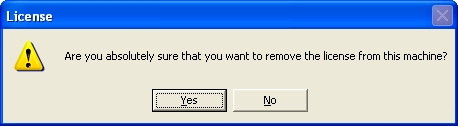
5. Click on the Kill button in this dialog.
This displays a confirmation message:
6.
Click the Yes button. (You
can be sure because you checked that there is only a trial license on this
machine, and are transferring a license from another machine.)
You will then see the following message:
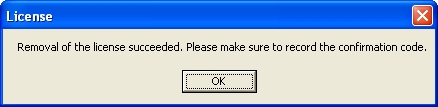
7.
Click OK.
This returns you to the “NetCOBOL Registration
(License Removal)” dialog with a confirmation code
inserted in the Confirmation field.
Since you have only removed a trial-license you do NOT need to record this
confirmation code and you do NOT need to communicate the code to Fujitsu
Computer Systems.
8.
Click Close.
This returns you to the second Fujitsu NetCOBOL
Registration dialog, which now has the “Transfer In” button enabled, and the
“Transfer Out” button disabled (there being no license to transfer out).
9. Click on the Transfer In button.
This displays the “NetCOBOL Registration (Transfer In)”
dialog:
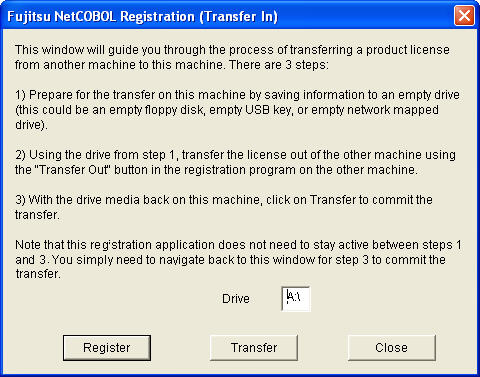
10. If you are using a floppy disk to transfer the
license, insert a blank floppy disk in your floppy drive.
If you are using a USB drive, insert the USB drive into a USB port.
If you are using a network location, ensure you have a drive letter mapped to
that location by using the "Tools>Map Network Drive" function in
Windows Explorer.
11. If the drive you are using is something other than
“a:\”, type the drive letter in the "Floppy Drive" entry field.
12.
Click the Register button.
The registration system writes some information to the specified drive, displaying
the following message when this process is complete:
13. Either remove the device (e.g. floppy disk, USB
drive) from the new machine and place it in the old machine or, if you are
using network drives, go to the old machine.
14. On the old machine, use Windows Explorer to navigate
to the “Fujitsu NetCOBOL for Windows\Regsoft” folder. If you used the default installation
location you should find this at: c:\Program Files\Fujitsu NetCOBOL
for Windows\Regsoft
15. Within this folder execute (or “Open”) the
application “FujitsuRegistration”.
This brings up the first NetCOBOL Registration dialog:
It should be displaying the type of license you have installed.
16. Click on Register to display the second Fujitsu NetCOBOL Registration dialog:
17.
Click on Transfer Out.
This displays the “NetCOBOL Registration (Transfer
Out)” dialog.
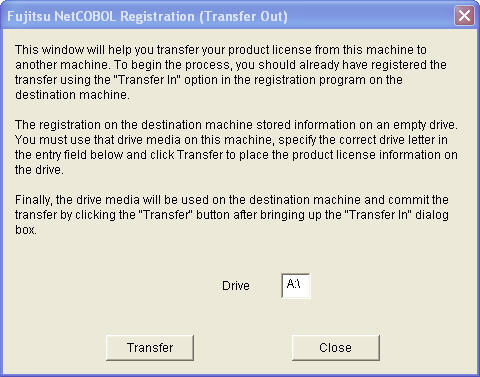
18. If your drive letter is something other than “a:\”
type your drive letter into the "Drive" entry field.
19.
Click on the Transfer
button.
The registration system transfers the license to the specified drive, then
displays the message:
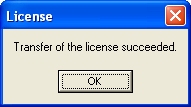
20. Click OK to return to the “NetCOBOL
Registration (Transfer Out)” dialog.
21. Click Close, Close and Exit to close the NetCOBOL Registration dialogs.
22. Either insert the moveable device in the new machine
or go to the new machine if you are using a network drive.
23. If you closed the registration dialogs on the new machine,
reopen them by executing the “FujitsuRegistration”
application in the Regsoft folder, which should be
located at:
C:\Program Files\Fujitsu NetCOBOL for Windows\Regsoft
if you took the installation defaults.
In the first NetCOBOL Registration dialog click
Register.
In the second NetCOBOL Registration dialog click
Transfer In.
24.
You should now have the “NetCOBOL Registration (Transfer In)” dialog displayed:
25. If your the drive you are
using is something other than “a:\” enter the correct letter in the "Drive" entry field.
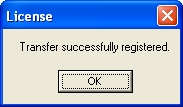
26. Click the Transfer button.
The registration software will transfer the license from the drive to your new
machine.
You will again see the transfer succeeded message:
27. Click OK to close the message.
28. Click Close to close the “Fujitsu NetCOBOL Registration (Transfer In)”
dialog.
29. Click Close to close the second Fujitsu NetCOBOL Registration dialog.
30. In the first Fujitsu NetCOBOL
Registration dialog click the Check button to confirm that the system knows
about your license. You should see a message like the one below,
depending on the type of license you transferred.
31. Click OK, and Exit to terminate the Fujitsu NetCOBOL Registration dialogs.
32. You can now uninstall the copy of NetCOBOL on the old machine. (If you need guidance on how
to do this see steps 14 to 24 of “Preserving a License
over Significant Machine Changes” below.)
Preserving
a License over Significant Machine Changes, or Upgrading from Windows 98/Me to Windows
XP/2000/Vista
Certain
machine changes, such as replacing the hard drive on which the NetCOBOL software is installed, will cause you to lose your
license - unless you take the appropriate action. Upgrading from Windows 98 or Me to Windows XP, Windows 2000 or Windows Vista also falls
into this category of change.
Before you
embark on these significant machine changes you need to execute a process
called “Killing” your license. Basically this removes your license from your
machine and gives you a confirmation code. You can then email this confirmation
code to Fujitsu Computer Systems and we will add 1 to the number of licenses available
to you. You can then make the changes to your machine and reinstall your NetCOBOL product, obtaining a new site key from the license-managing
server.
Detailed
Instructions
To do this:
1. Using Windows Explorer, navigate to the
Fujitsu NetCOBOL for Windows\Regsoft
folder. If you used the default installation location you should find this at:
c:\Program Files\Fujitsu NetCOBOL for Windows\Regsoft
2. Within this folder execute (or “Open”)
the application “FujitsuRegistration”.
This brings up the first Fujitsu NetCOBOL
Registration dialog:
It should be displaying the type of license you have installed.
3. Click on the Register button. This brings
you to the second NetCOBOL Registration window that
provides the license management functions.
4. Make sure you still have a record of your
serial number. It should be on the sleeve of your NetCOBOL
CD. If not, note it down from the dialog box.
5. Click on the Kill button.
This brings up the “NetCOBOL Registration (License
Removal)” dialog:
6. Click on the Kill button in this dialog.
This displays a confirmation message:
When you kill
the license you will not be able to use the NetCOBOL
product until you go through the process to obtain a new license described
below.
7.
If you are sure you are
ready to kill the license, click the Yes button.
If this is successful you will see the following message:
8.
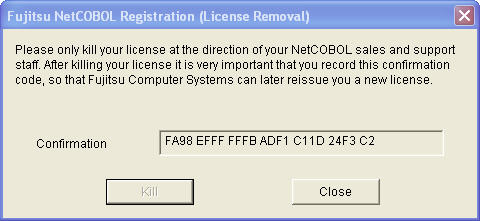
Click OK.
This returns you to the “NetCOBOL Registration
(License Removal)” dialog with a confirmation code
inserted in the Confirmation field.
9. Make sure you take a note of the
confirmation code.
The safest technique is to select the entry in the Confirmation field, press
Ctrl + C to copy the code, then open a text editor or word processor and press
Ctrl + V to paste the code into your document, like this:
DA34 8461 1E43 2128 9FA8 C8AD 27
Then save the document.
Using this technique ensures that you won’t make a
transcription error, and also means that when you need the confirmation code
you can copy it from your document.
10. After you have a note or copy of the confirmation
code, and have checked that it is correct, click on Close.
This returns you to the second Fujitsu NetCOBOL
Registration dialog:
11. Notice that the Kill and Transfer Out buttons are
now disabled – because these buttons are only valid when there is a license on
the machine. The Transfer In button is enabled because it is only valid when
there is no license on the machine.
12.
Click on Close.
This returns you to the first Fujitsu NetCOBOL
Registration dialog:
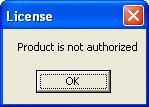
13.
Now if you click on the
Check button you will see a message saying that the product is not authorized:
14. From the first Fujitsu NetCOBOL Registration dialog click Exit.
This terminates the registration software.
15. IMPORTANT: You should now send an email note:
To:
cobol@netcobol.com
Subject: Kill
Confirmation Code
Text:
Should include your serial number (noted in step 4 above) and the confirmation
code (note you can copy this from the file you saved in step 9 above).
Either send it from the email address at which you
want the reply or include your email address in the note.
You will receive a reply letting you know when we have updated your license
count on the license-managing server.
16. Having removed the license you now need to remove
the software.
To do this go to the Start menu and select Start>Control
Panel.
17. In the Control Panel select “Add/Remove Programs”.
18.
Scroll down the list of
programs in the Add/Remove Programs Properties dialog until you reach “Fujitsu NetCOBOL xxxxx
Edition for Windows V9.0”, where “xxxxx” is
“Standard”, “Professional” or “Enterprise” depending on which edition you are
using. The snapshot below shows the
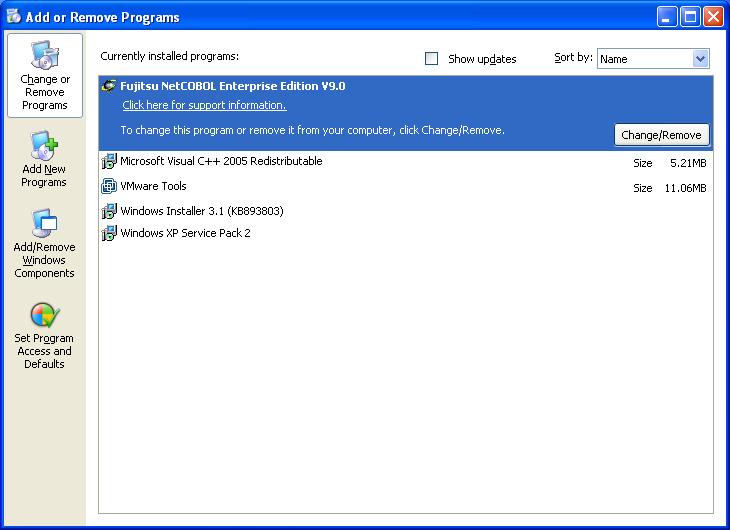
19. Click on the Add/Remove button.
This invokes the installation program for NetCOBOL.
The installation program controls both installing new components and
uninstalling the installed software. It displays a window offering you choices
to Modify, Repair, or Remove your software.
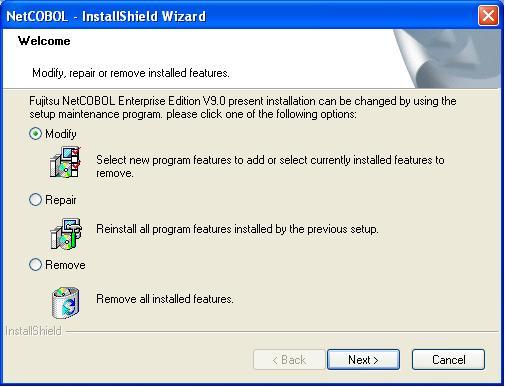
20. Select Remove, and click on “Next >”.
This displays a dialog asking you to confirm that you want to remove the
software.
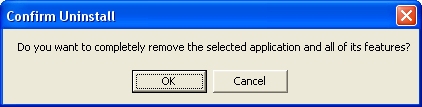
21. Click on OK.
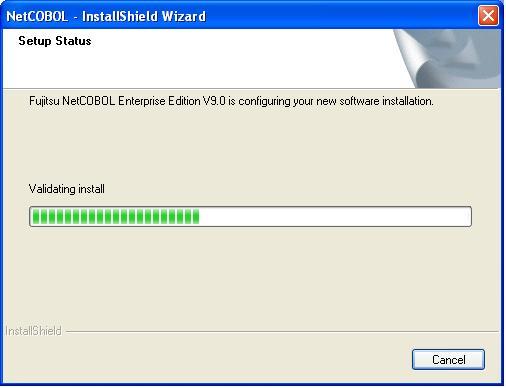
The InstallShield Wizard displays a window showing
you the progress of the uninstall:
22. If you installed your product from a CD you may see
a message prompting you to insert the CD, in which case you need to insert your
NetCOBOL CD in your CD ROM drive to complete the
uninstall:
23. Completion of the uninstall is confirmed by the following
window, which asks if you want to reboot:
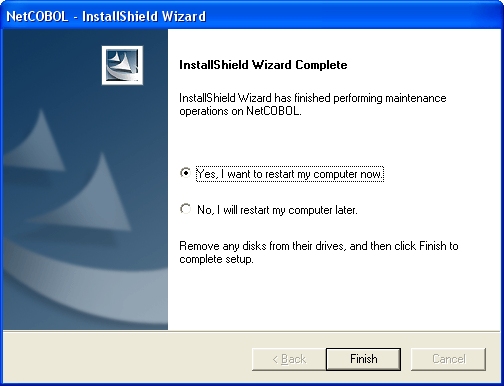
24. Select Yes if you want to reboot, or No if you want
to reboot later, and Click on Finish.
At this point
you can now perform whatever machine maintenance you have in plan.
Once the
maintenance is complete, and you have received a reply to your “Kill
Confirmation Code” note, you can proceed to reinstall NetCOBOL,
following the regular installation instructions.
Handling Machine Failures that
Cause Your License to be Lost
If you are in the unfortunate position to have experienced a machine failure that causes your license to be lost, such as loosing a hard disk, the only recourse is to open an incident using our web support tool http://www.netcobol.com/support/index.htm. Our support personnel will be happy to reinstate your license so you can reinstall your product on your new or repaired machine. Please include your serial number in your incident description.
You may have
the need for one user to have NetCOBOL on multiple
machines. For example, a programmer may want to take work home and continue to develop
his programs on his home PC, or he may have a notebook computer which he uses
when traveling, or he may have both.
In this
situation you should talk to a Sales representative to obtain our dual license.
We also need
to update your entry in our license control server to enable you to do this.
This chapter
covers possible errors that may be encountered when installing NetCOBOL licenses.
General
Guideline
A general
recommendation when troubleshooting
problems in the area of obtaining licenses
is to be careful! Rushing to try several different ways around a problem may
result in you obtaining and using more than one license (if your company has
purchased more than one license). This fact may not come to light for several
months – only becoming an issue when all licenses are used up, by which time
exactly what went on in an early install has been forgotten. We would prefer
that you open an incident using our web support tool http://www.netcobol.com/support/index.htm
to help us resolve the problem before licenses
are consumed.
When
running the Project Manager, the following message is displayed:
"Information about PowerGEM Plus installation is
invalid. Check that PowerGEM Plus is installed
correctly"
This message
is displayed when software (such as Microsoft's anti-spyware
software) has prevented NetCOBOL installing
successfully. Although NetCOBOL does not install any spyware, it appears that the Microsoft software may be
preventing certain registry settings so that some core NetCOBOL
software does not execute. If you encounter this problem follow the
instructions below.
Resolution:
- Disable all anti-spyware
software.
- Re-run the Autorun.exe from the CD or downloaded
version of Fujitsu NetCOBOL for Windows.
- Select "Repair" from the installation
options and click "Next"
- Once installation is complete you can enable
your anti-spyware software.
Possible
Conflicts with SpeedDisk Defragmentation
The licensing
mechanism has, in general, no conflicts with other software. However, we have
found that there is one defragmentation utility, SpeedDisk included with Symantec’s
Norton Utilities, which can interfere with the licenses.
Speed Disk
moves hidden licensing files, which causes license loss. The licensing files
are hidden system files that reside in the same directory as the Fujitsu
product.
Resolution:
Speed Disk
provides the following simple steps which enable you to avoid license loss:
1. Open Speed Disk, and choose File >
Options > Customize > Unmovable Files.
2. Specify that the *.ent,
*.rst, and *.key files cannot be moved.
3. Choose File > Options >
Optimization > Save to save the new profile.
You should now
be able to safely defragment your disk with Speed
Disk without losing your NetCOBOL license. Note that
these procedures are not necessary with most other defragmentation
utilities, including the default defragmenter available with Windows.
“Invalid
Serial Number”
If, after entering your serial number in the
Authentication dialog, you see the following message:
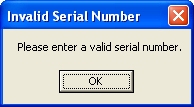
you are being told that you have entered an incorrect
serial number for the installer you selected.
It is likely
that one of the following has occurred:
·
You have mistyped the serial number.
Resolution:
Check that you
entered the serial number correctly and try the operation again.
If this
action is not successful, open an incident using our web support tool
http://www.netcobol.com/support/index.htm
asking us to confirm that you have a valid serial number.
“No More Keys for this
Serial Number Available”
If, instead of
a site key in the email response from the registration server, you get the
message:
“-10006 No more keys for this serial number available. Add more keys for
this customer using CasperDB.exe.”
you are being
told that you have used all the licenses purchased for this product.
Do not look
for “CasperDB.exe”! The message is generated automatically by the
registration-management software, and this program is used by Fujitsu Computer Systems
staff to update licenses on the server.
Resolution:
Contact
Fujitsu Computer Systems to confirm the number of licenses you have purchased, the
number you have used, and whether you need to purchase more licenses. See “Contacting Fujitsu Computer Systems”.
“Serial
Number is Probably
not Valid”
If, instead of
a site key in the email response from the registration server, you get the
message:
”-10004 No data returned in query of customer data; serial number is
probably not valid. Check the customer's information using CasperDB.exe.
(serial number: nn-nnnnn-nnnnn)”
you are being told that you have submitted a serial number that is not entered
in our database of registered serial numbers.
Resolution:
The chances
are that the serial number has been entered incorrectly. Check the serial
number that is displayed in the NetCOBOL Registration
dialog. If it is incorrect, correct it and go through the “Get Site Key”
process again.
If you are
confident that the serial number has been entered correctly, and test this by
re-entering, re-checking and re-submitting the serial number, then it may be
that there is a problem at the registration server end. Open an incident using our web support tool http://www.netcobol.com/support/index.htm
describing your problem so that we can help you resolve it. See “Contacting Fujitsu Computer Systems”.
“You Already have an Unlimited
License”
If, when you
attempt to validate a site code, you receive the message:
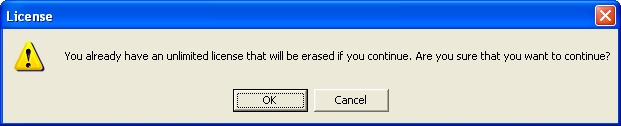
you are being
warned that you already have a valid license installed.
The best action is to Cancel out of this
dialog.
Only click OK
if you are working with a Fujitsu Computer Systems support representative who has told you that this
is a correct action. Normally responding “OK” will cause you to overwrite a
valid license, causing it to be lost (and licenses cost money).
Resolution:
If you do not
think you should have seen this message, or are unable to use your product
after canceling out of this dialog, open an incident using our web support tool http://www.netcobol.com/support/index.htm
to discuss the
situation with us. See “Contacting Fujitsu Computer Systems”.
“Sitekey does not match
current Site Code”
If, when
validating a site key, you get the message:
“SITEKEY DOES
NOT MATCH CURRENT SITE CODE”
you are being told that the system believes it has been given a site key that
does not match the site code – a code that identifies the installation machine
and product, among other details.
It is possible
that:
·
The site key has been entered or transferred
incorrectly.
·
A site key for a different product has
been entered.
·
A site key for the same product on a
different machine has been entered.
Resolution:
1. Check that you have entered or
transferred the site key correctly. Click on Validate again after correcting
the site key.
2. If you have requested site keys for more
than one product check that you have provided the correct site key for the
product.
Note: It is not easy to distinguish site keys so it is safest to register one
product at a time.
3. If you are registering products on more
than one machine check that you have provided the correct site key for the
machine.
Note: It is not easy to distinguish site keys so it is safest either to make
sure that you are sending and receiving the registration emails using unique
email addresses for each machine, or register the product on one machine at a
time.
4. If none of the above resolve
the problem, open an incident using our web support tool http://www.netcobol.com/support/index.htm.
See “Contacting
Fujitsu Computer Systems”.
“Program
moved or Sitekey
Bad Password”
If, when
validating a site key, you get the message:
“PROGRAM
MOVED OR SITEKEY BAD PASSWORD”
you are being told that the registration software has detected some unexpected
behavior.
It is possible
that:
·
The software has been moved between
generating the registration request and validating the site key. For example,
the software might have been uninstalled and reinstalled to a different location.
·
The site key has been entered or transferred
incorrectly.
Resolution:
1. Check that you have entered or
transferred the site key correctly. Click on Validate again after correcting
the site key.
2. If you have moved the software between
registration request and validating the site key, you can try uninstalling the
software and reinstalling to the original location. Then provide your site key
when you get to the NetCOBOL Registration dialog with
the Validate button.
3. If neither of these actions resolve your problem,
open an incident using our web support tool http://www.netcobol.com/support/index.htm
. See “Contacting Fujitsu
Computer Systems”.
Site
Code Product Number does not Match
Serial Product Number
If, instead of
a site key in the email response from the registration server, you get the
message:
”10061 Product number from site code does not match product number for this
serial number. You are using the serial number for the wrong product.
Check the casper.log file for details and make sure
that the data is set up
correctly in CasperDB.exe.”
you are being told that your email suggests you are
installing a different product than the registration database expects.
The most
likely cause of this message is an administrative error at the Fujitsu Computer Systems
end. We do not expect this to happen, but if it does, open
an incident using our web support tool http://www.netcobol.com/support/index.htm.
Do not look
for “CasperDB.exe”! The message is generated automatically by the registration-management
software, and this program is used by Fujitsu Computer Systems staff to update licenses
on the server.
Resolution:
Open an incident using our web support
tool http://www.netcobol.com/support/index.htm and describe the error message you received. State that you
believe that the
This appendix
lists the questions most frequently asked about the license management system.
1. The
“Transfer In” button is grayed out. I can't transfer in another license.
Why is this happening?
How do I get around this problem?
The “Transfer In” button is disabled if the
registration system detects any valid license, including the 5-day temporary
license.
First use the Check button on the first Fujitsu NetCOBOL
License dialog, to make sure what type of license is on the machine.
If it is a full license (not a temporary or trial license), you have no need to
transfer in another license.
If the license is a temporary or trial license then you should use the Kill
button to kill this license. The “Transfer In” button will then be enabled and
you can take the steps to transfer in the license from the device used in the
“Transfer Out” process. Transferring licenses is described in the section Transferring a License to
Another Machine.
Using the Kill function is described in the section “Preserving a License over
Significant Machine Changes”. However, if you are only killing a trial
license you do not need to send the confirmation code to us.
2.
I want to make some system changes on my operating system.
Do I need to protect my license? How?
Most operating
system changes do not affect your license. Even reinstalling your
operating system should not affect the license, provided that you do not
reformat your hard disk as part of the reinstall, or otherwise damage your
folder structure.
If you believe
that a particular operating system change is going to erase your NetCOBOL folder structure or contents then you should
follow the instructions described in the section “Preserving a License over Significant Machine Changes”
above.
3.
What if my hard drive crashes? What do I do with the license? Do I
lose it for good?
We understand
these things can happen without warning. Simply open an incident using our web support tool http://www.netcobol.com/support/index.htm
regarding
your situation. We will reinstate your license on our license-managing server.
Once you have recovered or replaced your machine, you can reinstall NetCOBOL. If you need to use the product before you hear
back from us (for example, if you encountered these problems at the beginning
of a weekend) then the 5-day temporary license that is initially installed with
the product, should give you sufficient time to continue with your work.
4. I
want to use SCAN DISK on my drive.
Should I know about something before doing this?
No. Scan disk
causes no problems with the licensing software.
There is one defragmentation utility, SpeekDisk
provided with Symantec’s Norton Utilities that can
cause problems. See “Possible
Conflicts with SpeedDisk Defragmentation” above for a description of the
simple work around for this software.
5. When
I try to execute NetCOBOL
I get a message saying “This file is not authorized at this site: AUTHORIZATION
NOT PRESENT”.
or
When I execute the Check function in the NetCOBOL
Registration program, I get the message “Product is not authorized”.
a) Why?
b) What do I do to fix it?
a) You get
this message if there is no valid license installed, including the situation in
which your 5-day temporary license has expired.
b) To fix the situation you need to register your software using the NetCOBOL Registration program.
Invoke this program by selecting Start>All Programs>Fujitsu NetCOBOL for Windows V9.0>Registration.
Follow the steps to register your software by getting a site key and validating
it. These steps are described in the installation guide sheets provided with
your product. The installation guides can also be obtained from the Download
page at the www.adtools.com site.
Before
contacting Fujitsu Computer Systems,
make sure that you have the following at hand, or
that you provide the following information in any written communications:
·
Your name
·
Your company name
·
Your fax number to which a
reply should be sent (if applicable)
·
Your telephone number
·
The product that you are using (e.g. “NetCOBOL Enterprise Edition”) – displayed in the Product
box.
·
If you are attempting to register your
product:
- the 18 digit Site Code – displayed in the Site Code
box. Double check that you have this exactly right.
- The 12 digit Serial Number – displayed in the Serial
Number box.
You can
contact Fujitsu Computer Systems in the following ways:
1. Use the Web
Support Tool, also called ServiceWise,
(registered users only), instructions for which follow. Advantage of the tool
is that it allows you and us to track the progress of resolving your questions
or problems.
- Log on using your full e-mail address in lower case as ID and leaving
password blank.
- To create new incident go to Submit New, Create New Incident, fill out the
New Incident form entirely, provide a short description of your problem or
question and click Submit.
- Your communication with Tech Support will continue via the Web Conversation
tool.
- To attach a file to an existing incident go to New Event, File Attachment and
provide the Name and a Description of the attachment (optional). Click Submit, then Browse to select the file. The second Submit attaches
it.
- For more information see the Web Support Tool
guide
2. Email
sales-related questions to cobol@netcobol.com